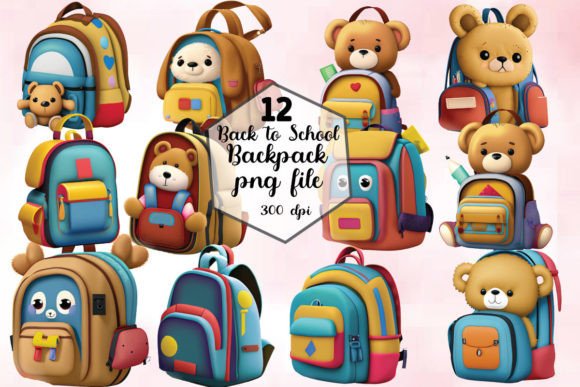
Back to School Backpack Clipart Bundle
If you're designing custom back-to-school merchandise—whether for a small business, classroom activity, or personal craft project—the Back to School Backpack Clipart Bundle offers a practical starting point. This collection includes 12 high-resolution PNG files, each carefully crafted with clean edges and transparent backgrounds. It’s optimized for sublimation, direct-to-garment printing, iron-on transfers, printable vinyl (using the print-and-cut function), and standard paper printing. You’ll get instant digital access after purchase—no waiting, no physical shipping.
What This Bundle Is—and What It Isn’t
First, clarify expectations: this is a set of ready-to-use raster graphics—not vector files. That means you’ll receive PNGs only. They are not SVGs, and they cannot be converted into true vector format without significant manual redrawing or AI-assisted tracing (which often degrades quality). If your workflow relies heavily on scalable vector assets for large-format signage or intricate Cricut/Silhouette cuts, this bundle won’t meet that need—no matter how tempting the preview thumbnails look.
That doesn’t make it less valuable. In fact, for sublimation on mugs, tumblers, tote bags, or kids’ backpacks, high-DPI PNGs often deliver sharper, more consistent results than poorly scaled vectors. The key is matching the file type to your intended use—not assuming “vector = always better.”
A Common Misstep: Assuming All Clipart Works the Same Way
Many buyers download clipart bundles expecting plug-and-play compatibility across every machine and platform. But here’s what often goes wrong: they try to import the PNGs directly into cutting software like Cricut Design Space or Silhouette Studio *as cut files*, then get frustrated when the software treats them as images—not cuttable outlines. Why? Because PNGs don’t contain vector paths. To use them for vinyl cutting, you must first use the “print and cut” feature—meaning you print the image, then let your machine scan and cut around its outer edge.
Example: A teacher wants to make personalized name tags for her students using printable vinyl. She downloads the backpack clipart, imports it into Cricut Design Space, and tries to “ungroup” or “flatten” it—only to find nothing happens. The fix? Select “Print Then Cut” in the layers panel, adjust the print size to match her tag dimensions, and ensure her printer is calibrated correctly. Skipping this step leads to misaligned cuts or wasted material.
Another Overlooked Detail: Resolution and Scaling Limits
Each PNG in the Back to School Backpack Clipart Bundle is delivered at 300 DPI, ideal for most sublimation and print applications up to 8" x 10". But if you plan to enlarge a single backpack graphic to cover an entire 16" x 20" pillowcase, pixelation may appear—especially along curved edges or fine details like zipper pulls or fabric texture lines. That’s not a flaw in the design; it’s physics. Raster images hold finite information.
Better approach: Use the files at or near their native proportions. For larger items, consider layering multiple smaller elements (e.g., scattered mini-backpack icons) instead of stretching one asset. Or pair them with simple vector-based borders or text—designed separately—to fill space gracefully.
Sublimation-Specific Considerations
For sublimation users, color accuracy matters. These PNGs are provided in RGB mode—not CMYK—because sublimation printers interpret RGB data more predictably. However, some beginners accidentally convert files to CMYK before sending to print, causing duller, less vibrant output. Always keep the original RGB files intact. If your sublimation software allows color profile embedding, use sRGB IEC61966-2.1—it’s the safest default.
Also, check transparency handling. Some sublimation workflows require white underbase or background masking. Since these PNGs have transparent backgrounds, they’ll print *only* where pixels exist—no unintended white halos. That’s a benefit—but only if your printer and RIP software support alpha channels properly. Test one file on scrap fabric first.
What to Verify Before You Buy—or Use
- File format confirmation: Double-check the listing says “12 PNG files”—not “SVG + PNG” or “EPS included.” Descriptions sometimes blur formats, especially on marketplaces with inconsistent tagging.
- Commercial license clarity: This bundle permits commercial use (e.g., selling finished mugs or t-shirts), but does *not* allow resale of the raw files or claiming authorship. Read the license summary before checkout—even if it’s just two sentences.
- Color consistency: Monitor calibration affects how blues, yellows, and reds appear on screen versus final product. Don’t judge vibrancy solely from your laptop display.
- Compatibility notes: While compatible with most design apps (Canva, Photoshop, Affinity Designer, Cricut Design Space), avoid opening PNGs in basic photo editors like Windows Paint—they may strip transparency or compress quality silently.
Why “Welcome to LS Creative Shop” Matters More Than You Think
The shop name isn’t just branding—it signals consistency. LS Creative Shop focuses specifically on sublimation-ready, classroom-friendly, and small-batch-friendly designs. Their updates often include seasonal variations (e.g., “Fall Backpacks” or “STEM-Themed Gear”) that maintain the same technical specs—so once you learn how to use one bundle, the next integrates smoothly. Following the shop means future purchases will behave predictably, saving time on relearning settings or troubleshooting new file quirks.
Final Thought: Match Tools to Intent
The Back to School Backpack Clipart Bundle shines when used intentionally—not as a universal fix-all. It’s excellent for educators making welcome banners, entrepreneurs launching limited-run merch, or hobbyists personalizing lunchboxes. It’s less ideal for sign shops needing billboard-scale vector art or designers building editable brand systems.
Your best move? Start small. Print one backpack on a test mug. Try it on a vinyl-cut tote. See how the colors land. Adjust brightness or contrast *slightly* if needed—but avoid heavy filters that muddy detail. Let real-world testing—not thumbnail appeal—guide your next steps.